I reorganized P's creative space. It felt great to put things in proper places and discard the junk. It also made me aware of what we have too much of. Crayons for example....and there might be some childhood trauma associated to this.
As a child my parents bought me very few things unless they had something to do with tennis. Crayons were one of those things I desperately wanted but never really got. I think the biggest box I got was 64. I dreamed of the large box with the sharpener in the bottom. Instead I colored with the side of the crayon and rotated it so that it would stay sharp!
Anyway, when I cleaned out the art box I realized P had so many crayons she could launch her own school. She's gotten the largest box possible from us, as gifts and then there's me with my trauma. I bring home every crayon from every restaurant we've dined at that offers free crayons. I actually got annoyed with myself and a little jealous of P that we have so much now and I had so little of it then. Then I got over it.
I remembered some pretty cool art projects done with crayons from some of my favorite blogs. But, I thought I'd start with something not too complicated. Melting crayons seemed like a possible task. I got my directions from this blog. It was easy to follow.
We started by sorting through all our crayons. We kept only the clean crayons and melted all the pieces and restaurant crayons.
Every step of sorting was wildly entertaining to P. She loved finding pieces and taking the wrappers off and then putting each crayon where it belonged.
Then we sorted by color. Even more entertaining to this 4 year old!
Dave got me mini cans of soda to cut and use as the melting containers for each color. These soda cans went into a pan with simmering water. I would recommend using a pan you don't really care for. I made the mistake of using one of my good ones. When you pour the melted crayons into the molds the wax will drip down the side of the can. You will have to put the cans back into the simmering water as you work to keep the wax liquid. Also, if you fill the pan with too much water the soda cans tend to float if they don't have enough crayon in them. An inch of water or less keeps the cans from flipping. I was paranoid of getting wax on my good pan! I can't imagine eggs tasting good with an essence of Crayola!
You will want to cover the space where you'll pour the wax into the molds with newspaper or something. Even though our counter top is granite and the wax came off easy, there was quite a splatter of wax. It was much easier to just pick of the paper and throw it all out when done.
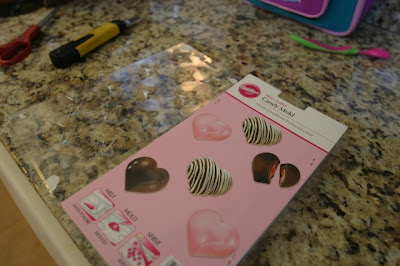
I bought star and heart candy molds from Michael's for $1.99 each. They have many different options but I thought I'd start small.
The rest was pretty easy. Just pour the hot wax into the molds and then put them into the freezer for 5-10 minutes. After they've cooled they slide out when flipped over very easy. Because this was my first time I didn't do too many color combinations. On the few that I did combine it was pretty cool to see the color swirls.
My only changes from the original instructions were that I cut the paper off the crayons before melting them. I found it easy to cut whatever wrapper was left on the crayon with a sharp blade. For the most part, the wrapper seemed to fall off in one piece that way. And P helped throughout the entire process. She did not handle the hot soda cans but she did stir the wax with large Popsicle sticks. It depends how comfortable you are with a stove and kids. P cooks with me all the time so both of us were cautious but ok with it all.
Dave was so amazed we created fresh, fun crayons out of old junky pieces. And I feel so much better about our excess of crayons. And to some extend my soul healed a little bit.


